iPhone, iPad, and iOS Proxy Setup Guide: Step-by-Step Proxy Configuration
This article will show you how to configure proxies on iPhone, iPad, and other iOS devices.
This step-by-step guide will help you set up proxies in iOS, whether on your iPhone or iPad. All Apple smartphones and tablets use the same proxy settings in iOS. After the setup is complete, your internet connection will automatically use the proxy and your IP address will be changed accordingly.
To configure a proxy on iOS, you need a Wi-Fi connection, your iOS device, and your purchased proxy details.
Step-by-Step Instructions to Set Up a Proxy on iPhone and iPad (iOS)
Setting up a proxy on an iPhone is not difficult, but you need to follow the steps carefully.
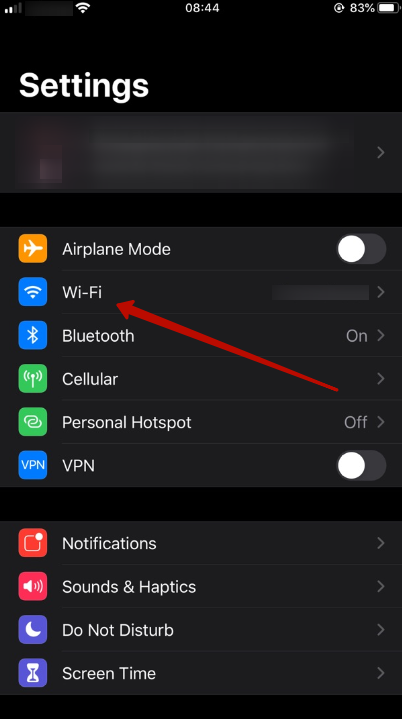
- Open the Settings menu and tap on Wi-Fi.
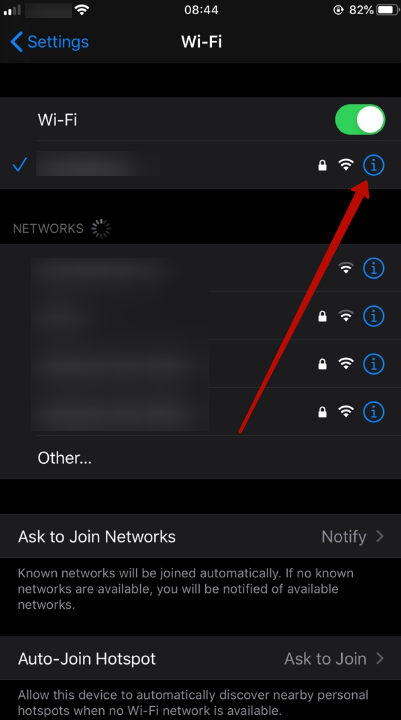
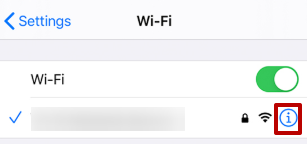
- Tap the "i" icon next to the Wi-Fi network you are connected to.
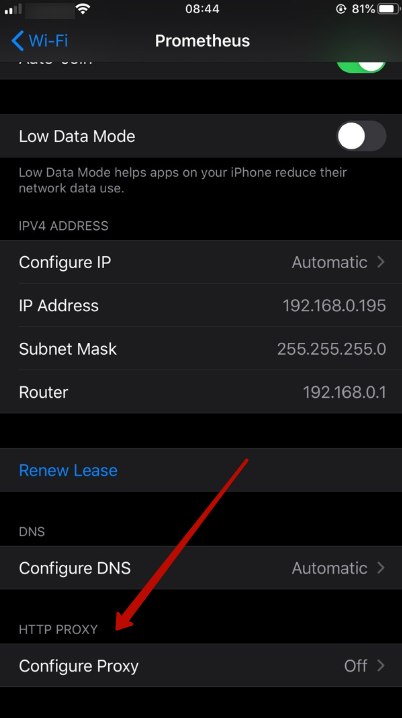
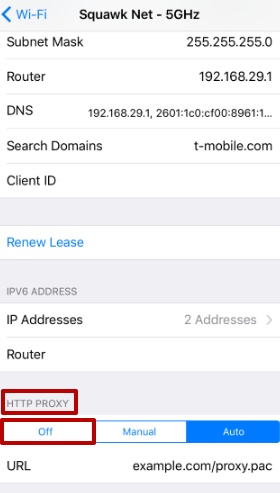
- Scroll down to the bottom of the page to find the "HTTP Proxy" section.
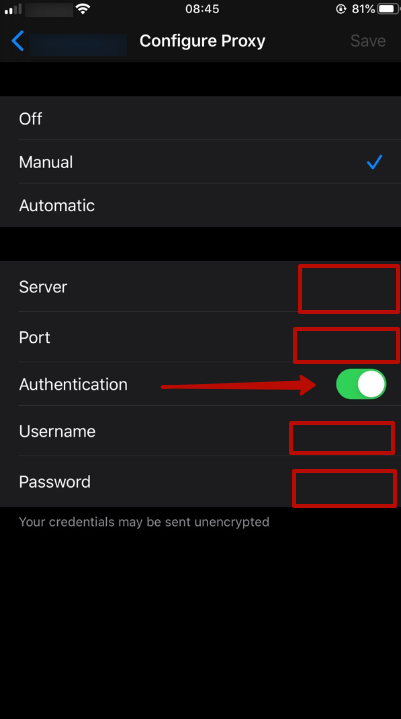
- Set up the proxy manually by selecting Manual. Enter the IP address and port number of your proxy server as provided.
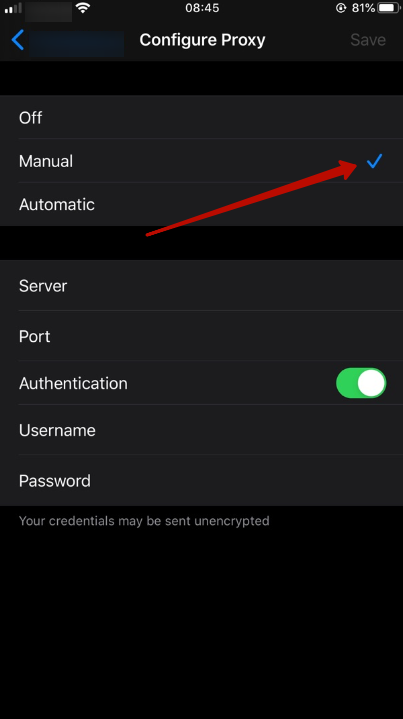
- If you have been given a username and password with your proxy purchase, tap Authentication and enter your credentials.
That’s it! Your proxy is now configured and will be used for all traffic on that Wi-Fi network.
How to Disable Proxies in iOS (iPhone & iPad)
Proxy servers should only be disabled on iOS devices when necessary. Follow these steps to turn off a proxy on your iPhone or iPad:
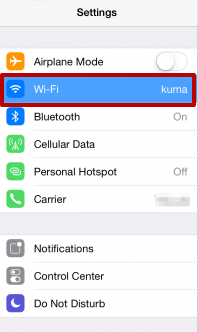
- Open Settings and select Wi-Fi:
- Tap the "i" icon next to your connected Wi-Fi network:
- Scroll to the "HTTP Proxy" section at the bottom, and in the "Proxy Settings" column, switch the mode to Off:
Once completed, the proxy will be deactivated. Remember, using a proxy server on your daily device is not just a trend but a necessity for safe and efficient internet usage. Proxies help keep your activities secure and private on iOS devices.