How to Configure Java Proxy Settings in Windows
To configure Java proxy settings on a Windows operating system, you need to find and open the relevant control panel. On Windows 7 and later versions, use the search bar—either via the Start button or the Win + R keyboard shortcut (also applies to newer versions of Windows).
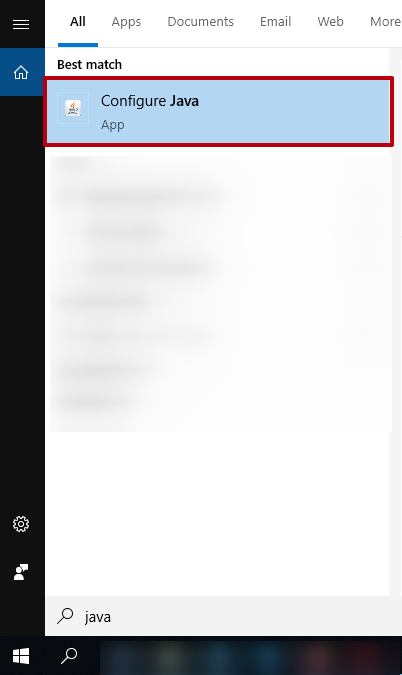
Press the Start button or use the Win + R keys to bring up the search/run panel.
How to Configure Java HTTP Proxy
Follow these steps to configure the Java HTTP proxy:
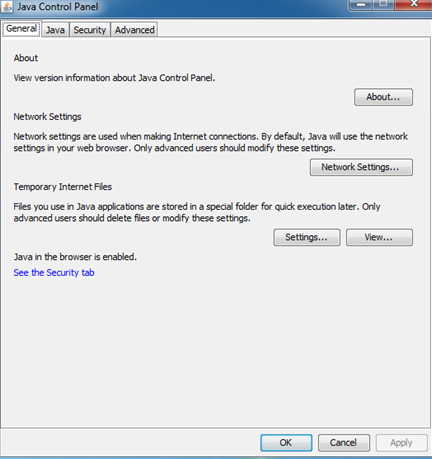
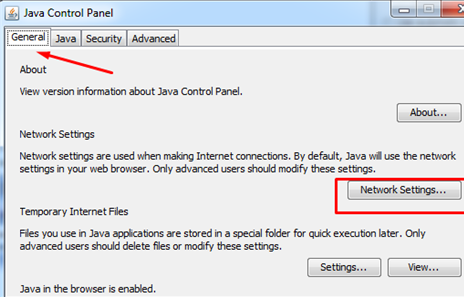
1. On the main screen of the Java Control Panel, select the "General" tab and then click on "Network Settings".
2. Check the option "Use browser settings". (Alternatively, you can manually set up a SOCKS proxy server for Java.)
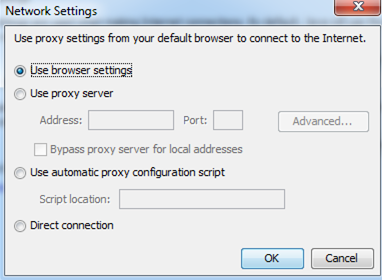
3. Click "OK" to save the changes.
These proxy settings are necessary for running certain Java applications, such as applets embedded in HTML pages. After applying the settings, close your browser. Then restart it and try to run the Java application again. If it loads correctly, everything is set up properly.
If not, you may see an error message like this:

If this error occurs, you will need to check and configure your browser’s proxy settings as well.
This is how you configure the Java proxy on Windows.