MacOS Proxy Setup Guide: Step-by-Step Proxy Configuration
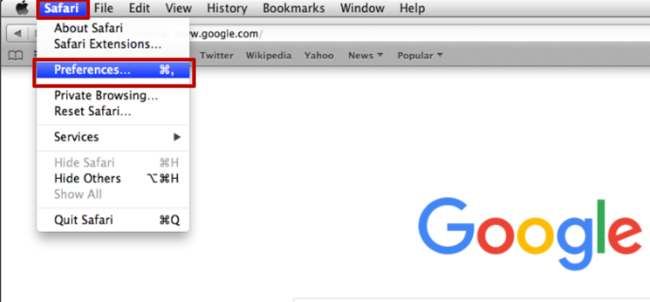
Configuring proxies in Safari and MacOS is not as complicated as it may seem at first glance. Safari is the default browser on MacOS.
To launch Safari, click the compass icon in the Dock. A browser window will open. Working in Safari is essentially similar to other browsers. Let’s look at the basic proxy settings in Safari.
● To configure a proxy server on a Mac device, simply open Safari and follow a few easy steps:
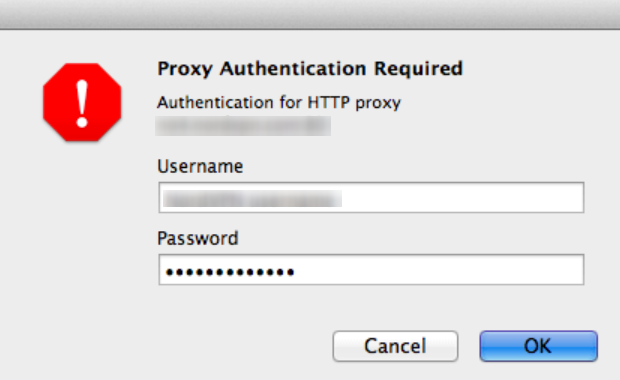
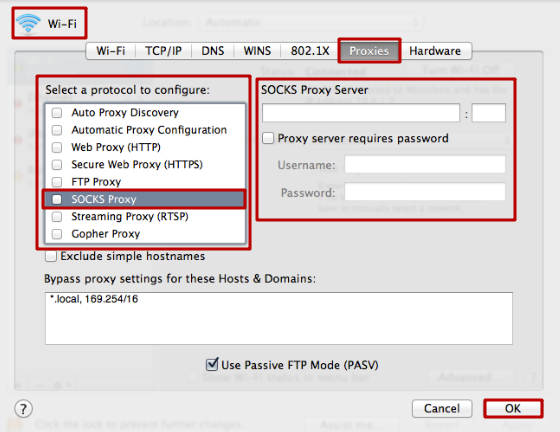
● In the new window, fill in the fields for the proxy server address and port number. To complete the setup, click “OK”. If the selected proxy server requires a username and password, you will see a prompt for these credentials the next time you try to access any website.
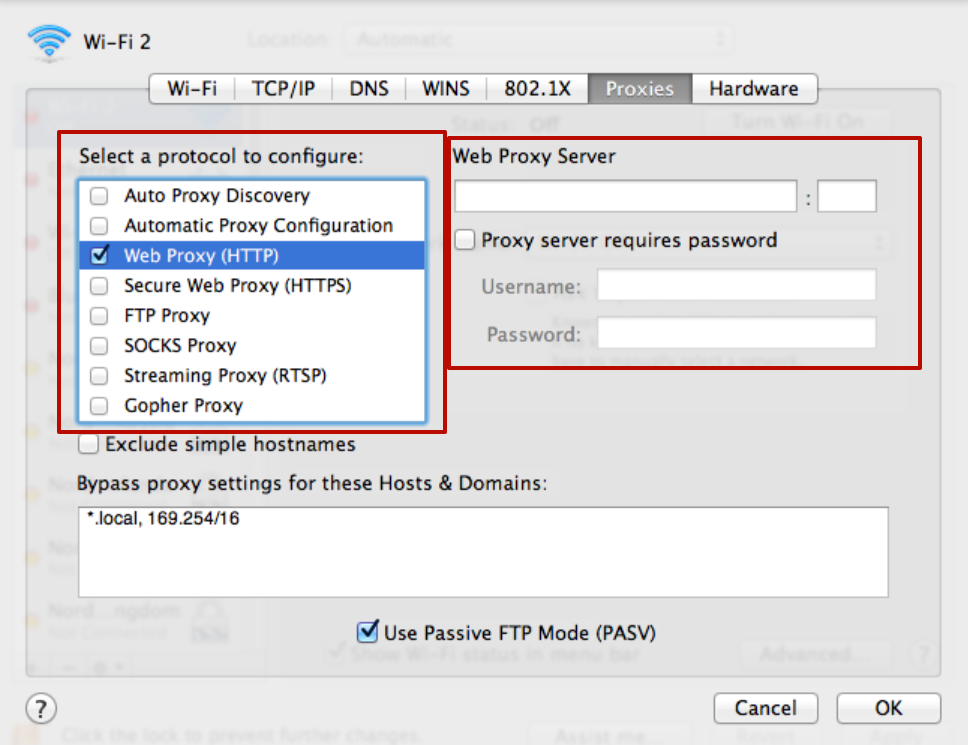
If your proxy server is linked to your main IP address, you don’t need to enter anything else and can use the Internet freely.
This completes the Safari and MacOS proxy setup. For online privacy and security, we recommend always using a dedicated/private proxy.
How to Disable Proxy for Safari on MacOS
To disable the proxy server on a Mac device, you also need to perform a few actions in the open Safari browser. It’s recommended to do this only if you really need to.
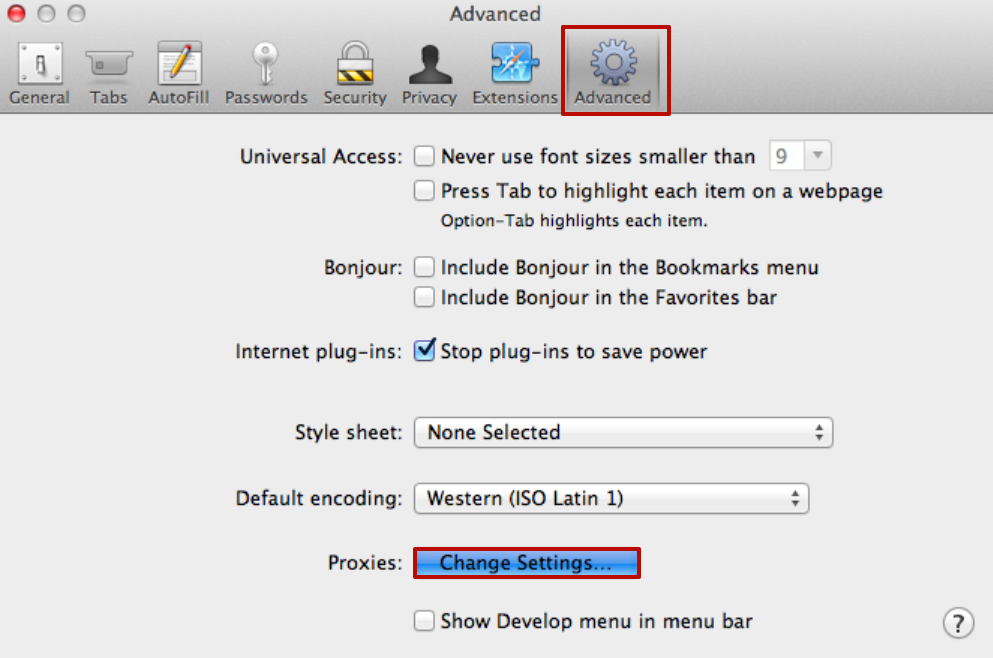
● In the top area of the browser, select “Advanced” and then click on “Proxies: Change Settings”:

● In the opened “Wi-Fi” window, select from the menu above the “Proxies” category and uncheck all the boxes. Then click “OK”:
From now on, the proxy will no longer be active. However, after resolving any issues that caused you to disconnect the proxy, you can reconnect at any time for secure browsing. These steps will help protect your personal data and prevent common issues users face while online.