Windows 7 Proxy Setup Guide: Step-by-Step Proxy Configuration
Step-by-step proxy settings in Windows 7
1. Go to “Start”, “Control Panel”.
2. Search for “Internet Options”, click on the text.

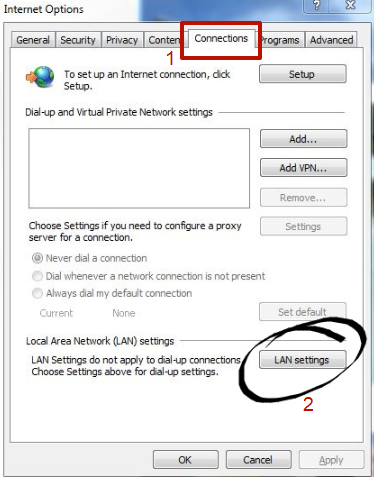
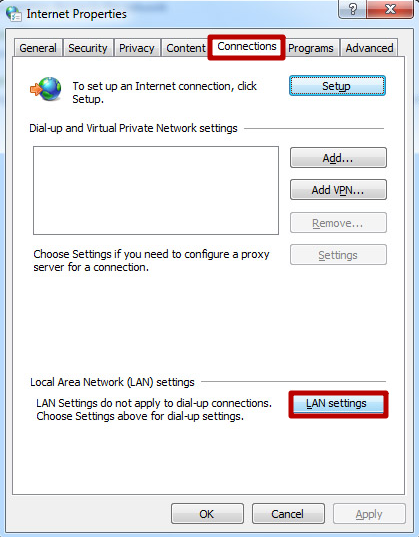
3. Then select “Connections” - “LAN settings” in the window that opens.
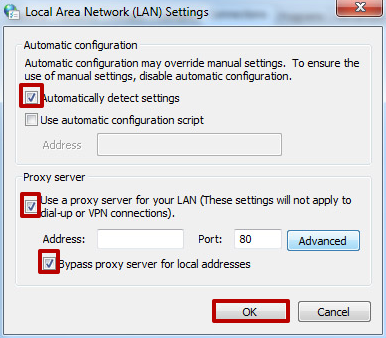
4.Checkboxes should be placed as in the screenshot. The system requires you to enter the server number (IP) and port information.
5. Next, click on “Advanced”.
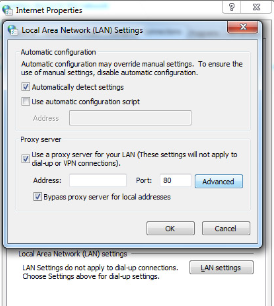
6.The next step is a checkmark opposite “Proxy for all protocols”.
After the necessary steps with the proxy in Windows 7 are completed, you need to open any browser. A notification about the need for authorization will appear. Enter the username and password. For servers authorized by IP, these steps are not required.
Sometimes the settings are not correct on the first try in Windows 7 through a proxy. In this case, there is no need to despair. Go through all the steps again, based on the step-by-step instructions “How to set up proxies in Windows 7”. After a successful installation, you can continue to comfortably surf the Internet through a proxy server.
Disable proxies in Windows 7
Almost all modern browsers use the system settings of the proxy server. Therefore, when you close them in Windows 7, they also close in the browser (except Mozilla Firefox).
Disabling proxies can be invoked when the following issues arise:
- crashes of sites;
- the presence of malware with its own proxies;
- inaccuracies in the definition of parameters.
If, for the above or other reasons, you need to disable the proxy server in Windows 7, you should use the universal method.
Step-by-step guide to disable proxies in Windows 7
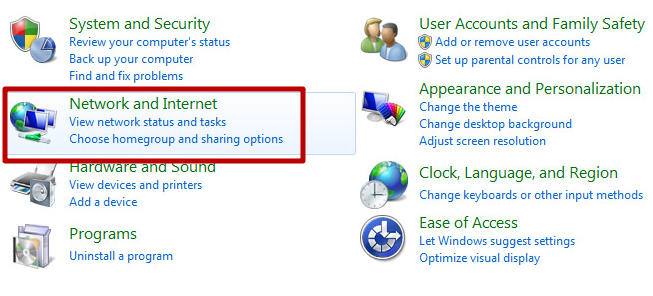
1. Open the control panel and select “Network and Internet”:
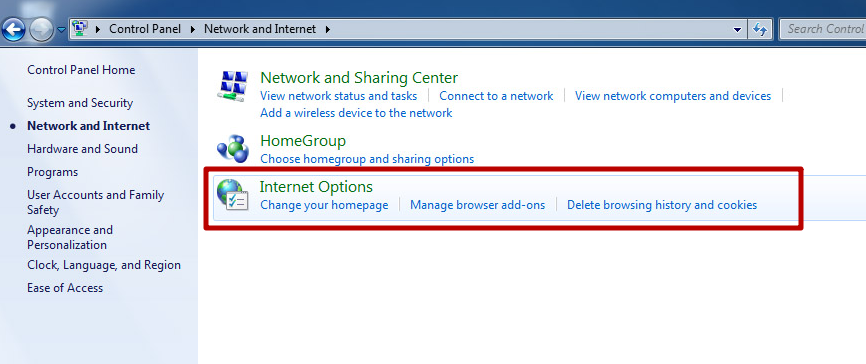
2. Select “Internet Options”:
3. In the “Connections” tab, press the “LAN settings” button:
4. Remove all checkboxes and press the “OK” button:
After applying these settings, the proxy server in Windows 7 will be disabled. It will also not work in the browser. Once the reasons for the disconnection are eliminated, the proxy can be reconnected in a known way.