How to Disable IPv6 Traffic on My Windows Computer?
IPv6 refers to a set of protocols used for exchanging information over the global network. It is enabled by default in newer versions of Windows. In most cases, this protocol does not interfere with the system’s performance. However, sometimes issues may occur (for example, voice drops during calls), leading to the decision to disable IPv6 on the computer.
Let’s see how to do this in three popular versions of Windows.
How to Disable IPv6 in Windows 7
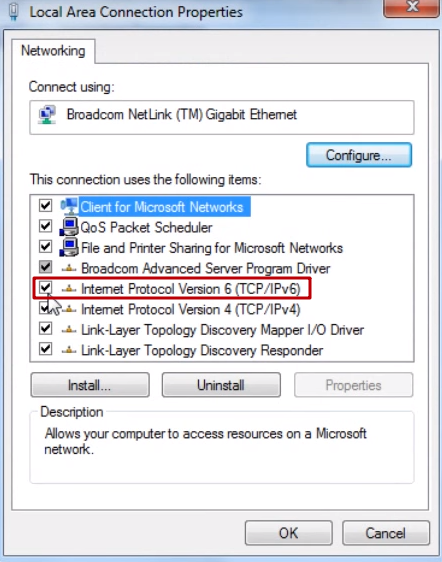
You can open the network interface properties and uncheck the IPv6 box. However, the operating system developers do not recommend doing this. Programs that use interface tunneling with loopback may not work correctly.
It is recommended to disable the protocol using the registry. Follow these steps:
- Run Regedit.exe. Press the "Start" button and type it in.
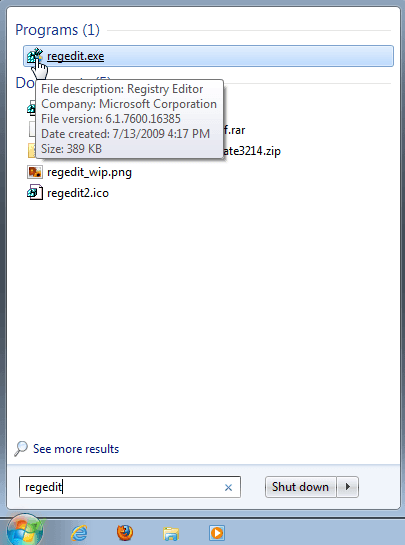
The registry editor window will open, divided into two sections.
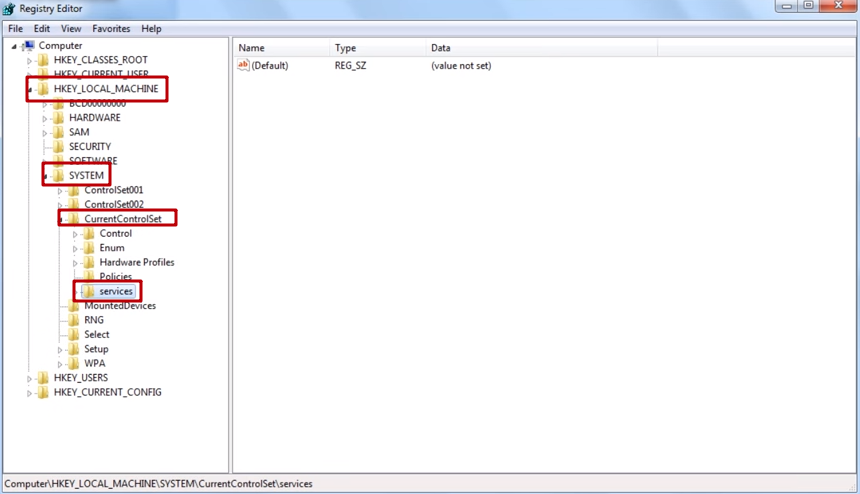
2. Navigate step-by-step to the specified sections.
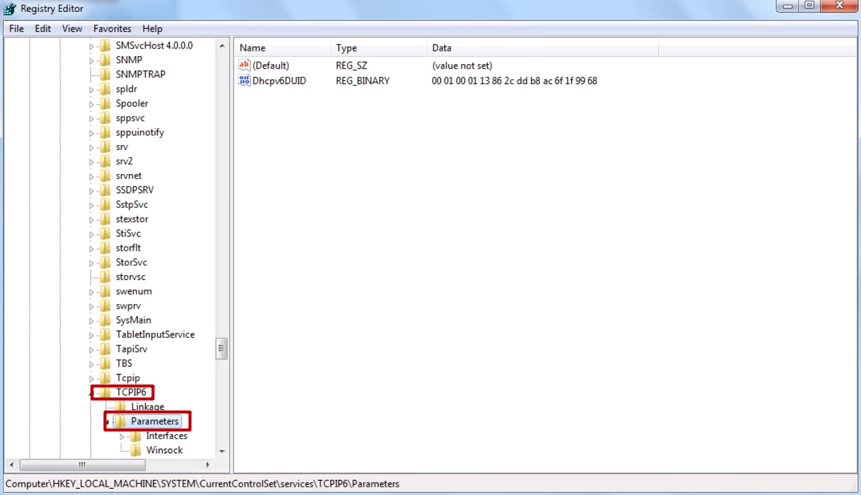
3. Then, select TCPIP6 \ Parameters.
4. At the top of the registry editor, go to the Edit menu - New - and select DWORD (depending on your OS version: 64-bit or 32-bit) - name it DisabledComponents.
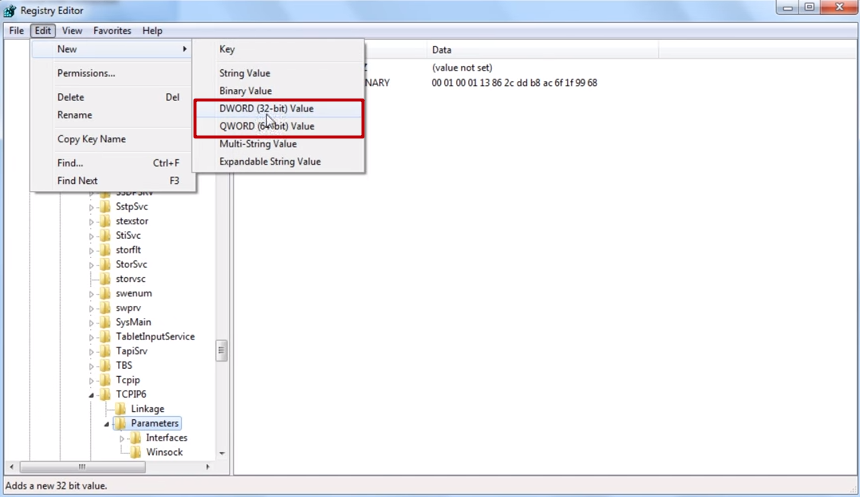
Click the Edit menu - New - DWORD - select Disabled Components.
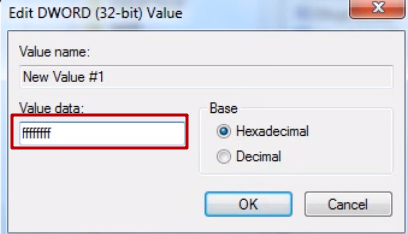
5. Set the value of this parameter to ffffffff in hexadecimal (not decimal).
6. Restart your computer.
After restarting, if you still see the IPv6 checkbox ticked in the network interface properties, don’t worry. You did everything correctly, and the protocol is disabled. You can verify this by running the ipconfig –all command. This command will display only the IPv4 address.
How to Disable IPv6 in Windows 8
Now let’s see how to disable IPv6 in Windows 8. Here are three ways to do it.
1. The first method is the same as in Windows 7, with a small difference at the first step. This is because Windows 8 does not have the familiar Start button in the lower-left corner. Instead, press the Win + R key combination (this also works in Windows 7).
After that, the rest of the steps are the same.
2. In the second method, move the mouse cursor to the lower-right corner in window interface mode until the side menu appears.
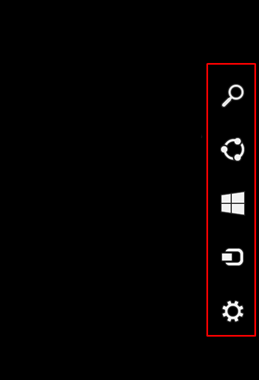
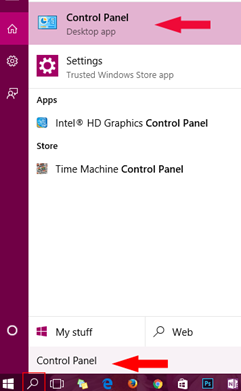
Click the magnifying glass icon and you will see the following screen.
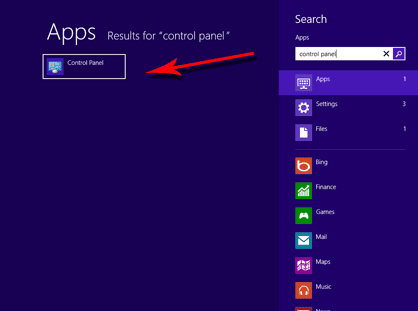
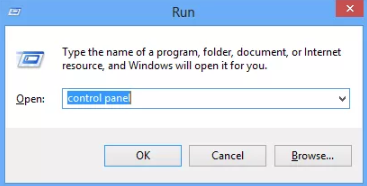
Click on "Control Panel" to open it. You can also open the same panel by pressing Win + R and typing Control Panel.
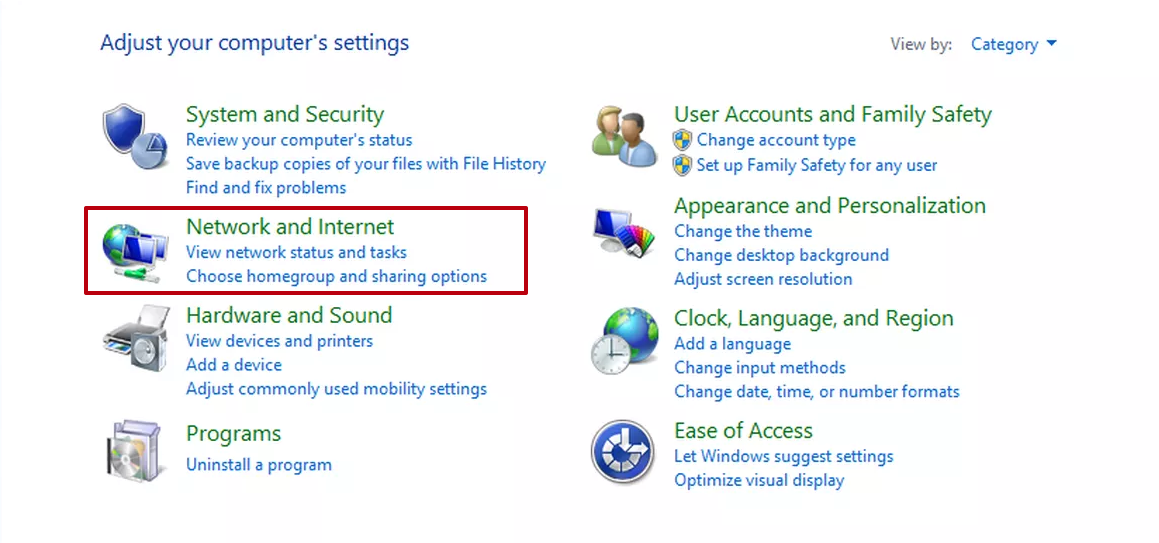
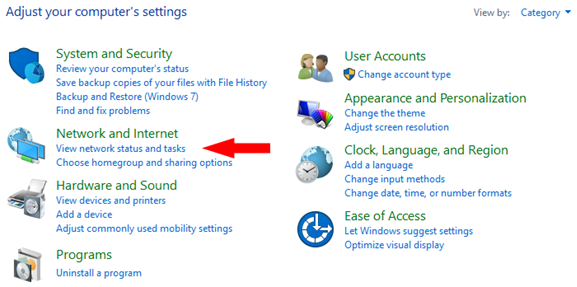
In the Control Panel window, select "Network and Internet".
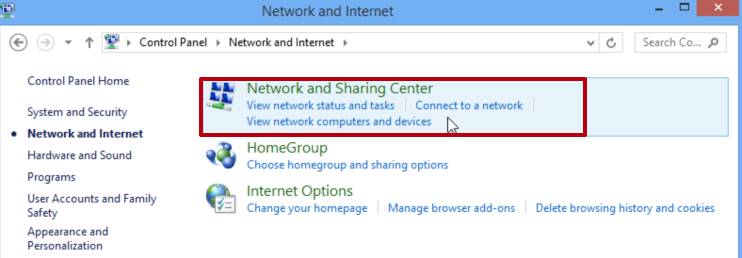
Next, click "Network and Sharing Center".
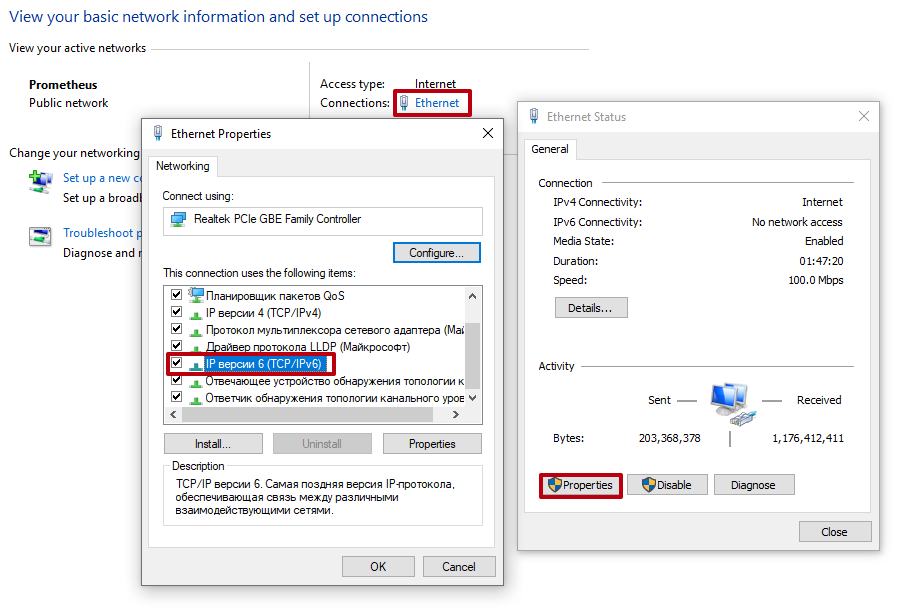
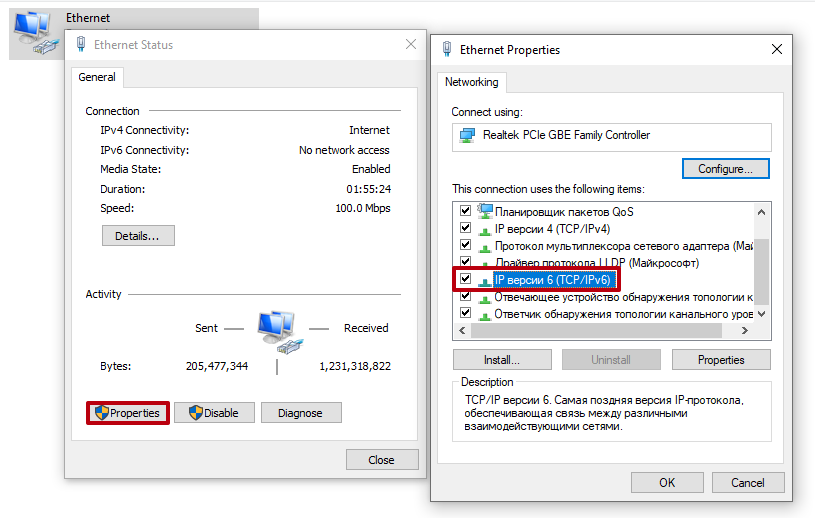
Then, select your wireless network (or Ethernet) / Properties / uncheck IPv6 and click OK.
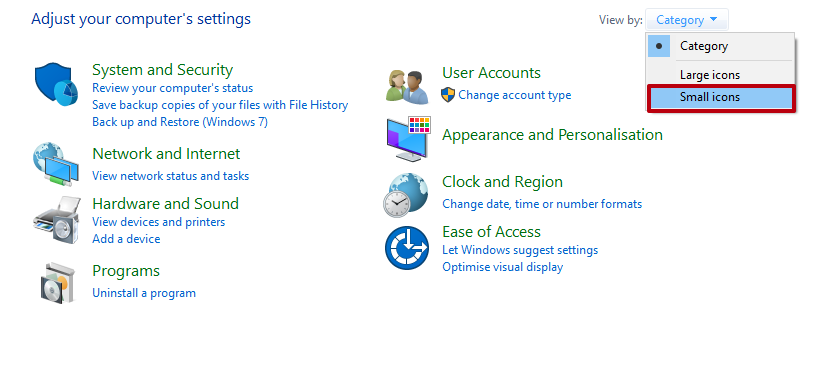
You will need to open the Control Panel again and select "Small icons" in the "View by" category.
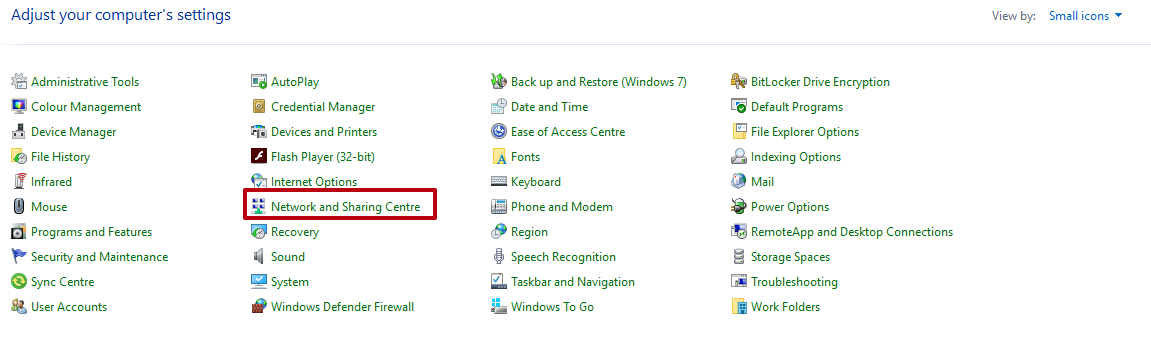
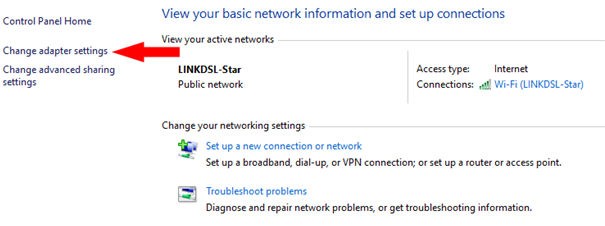
Then, click "Network and Sharing Center".
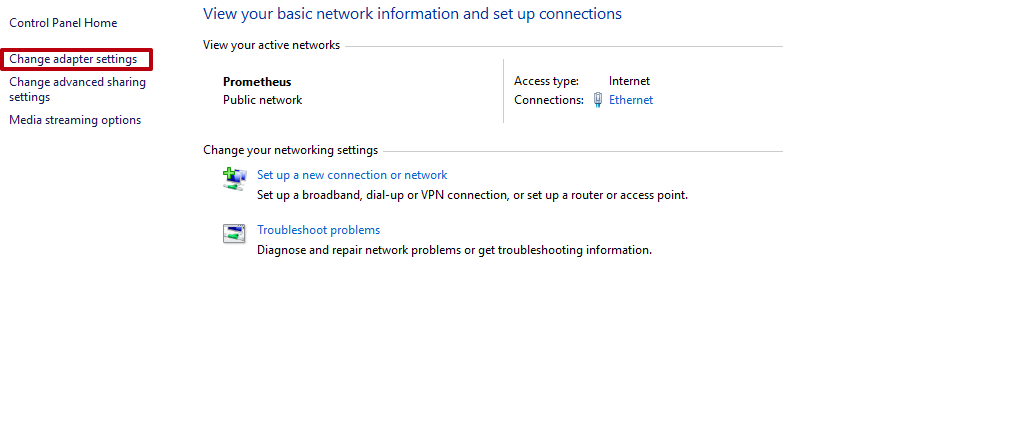
From the left-hand menu, choose "Change adapter settings".
Then, proceed as in the previous method.
Click OK and restart your computer.
How to Disable IPv6 in Windows 10
Finally, let’s learn how to disable IPv6 in Windows 10. Essentially, there is no significant difference between Windows 7, 8, and 10. The steps are almost identical. Disabling IPv6 in Windows 10 involves the following:
Open the familiar settings panel.
Click on "Network & Internet".
Next, click "Change adapter options".
The rest of the process is the same as in Windows 8.
After disabling the protocol, restart your computer. You can also read our detailed guide on configuring a proxy in Windows 10.
We hope this article helps our readers easily disable IPv6 and succeed on the first try!