Setup Guides
Instato Proxy Setup Guide: Step-by-Step Proxy Configuration
Instato Proxy Setup Guide: Step-by-Step Proxy Configuration

Instato is a popular social marketing tool and Instagram growth bot. Its features include automatic follow/unfollow, likes, comments, DMs, and scheduled posting—usable by any user. However, it requires proxy servers. So, how do you set them up?
How to Configure Proxies in Instato: Step by Step
- First, log in to your Instato account.
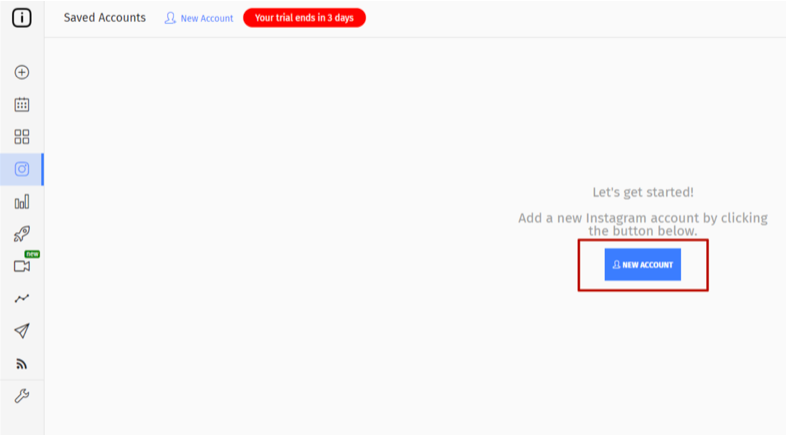
- Once logged in, you’ll see a NEW ACCOUNT button on your dashboard. Click it.
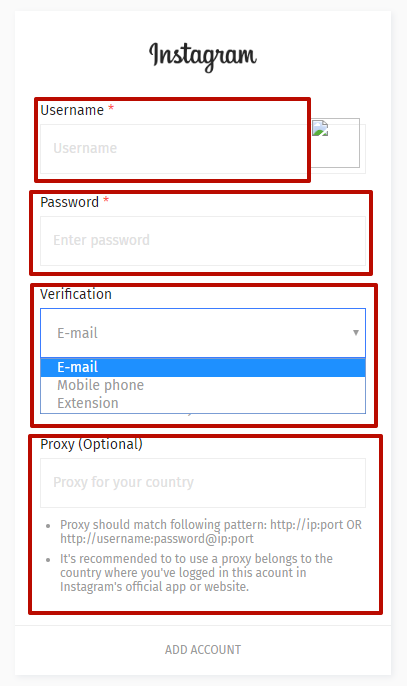
- Instagram authentication will appear. Enter your Instagram account’s username and password. Optionally, select a verification dropdown. The proxy should be from the same country as the account’s original creation. Enter your proxy details in one of these formats:
http://ip:port or http://username:password@ip:port.
These details are included in your proxy order email. We highly recommend using only elite private proxies. Then click ADD ACCOUNT.
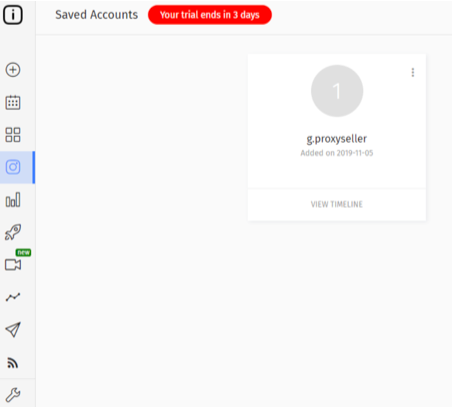
- That’s it! If the configuration is correct, you won’t see any errors. If you do, double-check your proxy details and try again. Understanding proxy types is also important.
- After this, you can start automating your account safely.
Last updated:

Windows 7 Proxy Setup Guide: Step-by-Step Proxy Configuration
Windows 7 Proxy Setup Guide: Step-by-Step Proxy Configuration
Windows 8.1 Proxy Setup Guide: Step-by-Step Proxy Configuration
Windows 8.1 Proxy Setup Guide: Step-by-Step Proxy Configuration
Windows 10 Proxy Setup Guide: Step-by-Step Proxy Configuration
Windows 10 Proxy Setup Guide: Step-by-Step Proxy Configuration