Setup Guides
FollowLiker Proxy Setup Guide: Step-by-Step Proxy Configuration
FollowLiker Proxy Setup Guide: Step-by-Step Proxy Configuration

FollowLiker is an automatic social media marketing bot for the most popular networks, including Instagram, Twitter, and Pinterest.
This bot offers features such as auto follow/unfollow, automatic direct messaging and commenting, auto likes, scheduled posting, and more. Please note: FollowLiker is available only for Windows. macOS and Linux users can access it via a remote Windows server.
How to Set Up Proxies for Accounts in FollowLiker?
- FollowLiker does not accept domain-based proxy servers (e.g., arnproxy.com:61234). You must use proxies in the IP:PORT format. You can buy elite proxies in this format from arnproxy.com.
- When you open the application, you can add your proxies using two different methods. Let’s review both methods below.
Method 1: Importing a Proxy List
- If you use a proxy list, FollowLiker will automatically assign each unused proxy to an account.
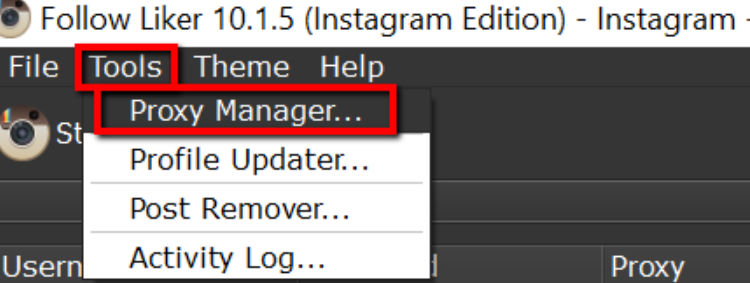
- To import a list, go to Tools → Proxy Manager in the menu.
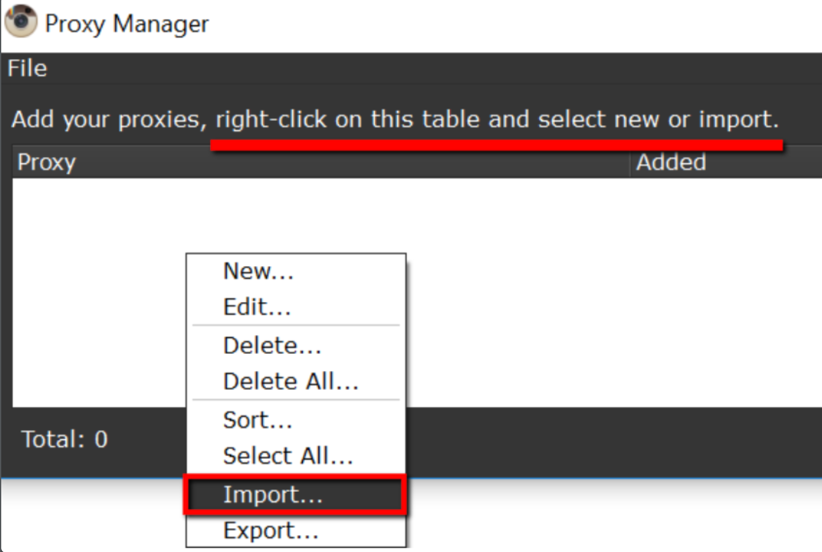
- Right-click on the table and select Import.
- Select your proxy list file (must be in .txt format). The format should be:
- IP:PORT:Proxy_Username:Proxy_Password – for username/password authentication
- or IP:PORT – for IP-authenticated proxies
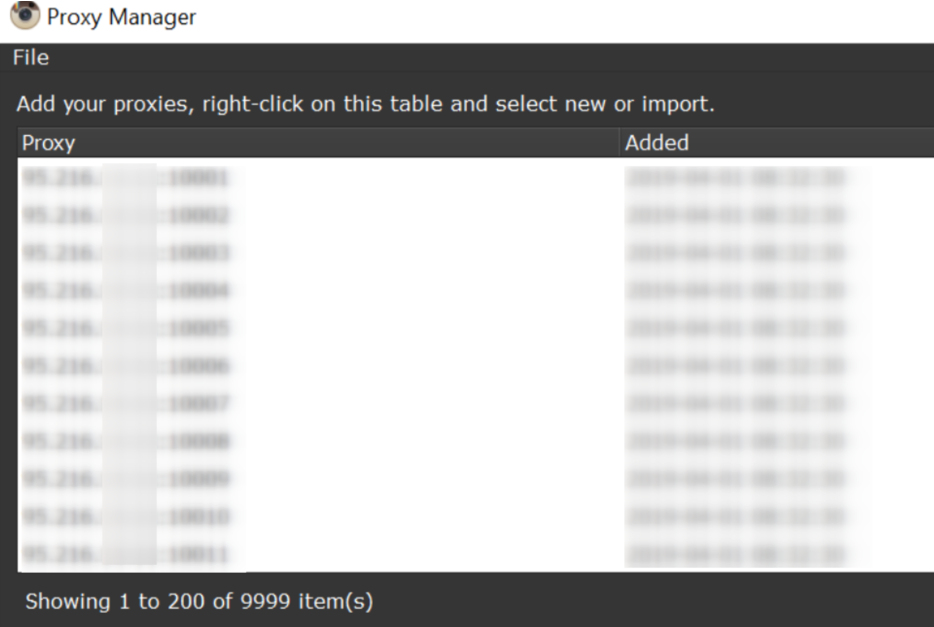
- That’s it! The program will automatically assign the proxies to your accounts—no further action needed.
Method 2: Assigning a Proxy Manually to an Account
- When adding or editing an account, you can assign a proxy to that account manually. The format must be as described above.
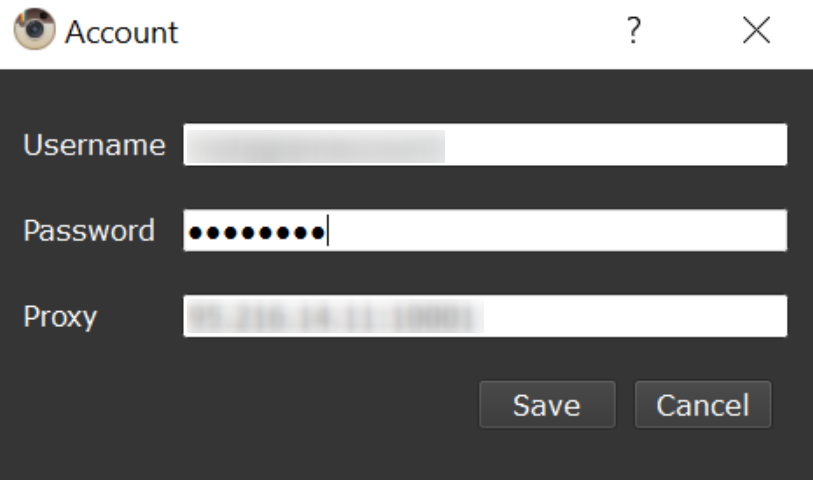
For more details, you can also read our IGAssistant Proxy Guide.
Last updated:

Windows 7 Proxy Setup Guide: Step-by-Step Proxy Configuration
Windows 7 Proxy Setup Guide: Step-by-Step Proxy Configuration
Windows 8.1 Proxy Setup Guide: Step-by-Step Proxy Configuration
Windows 8.1 Proxy Setup Guide: Step-by-Step Proxy Configuration
Windows 10 Proxy Setup Guide: Step-by-Step Proxy Configuration
Windows 10 Proxy Setup Guide: Step-by-Step Proxy Configuration